You need a few things in life, like a good barber or mechanic and if you need to do anything around the house or even assemble that new TV you bought - you need a good screwdriver set.
Take a look at craftsman screwdrivers:
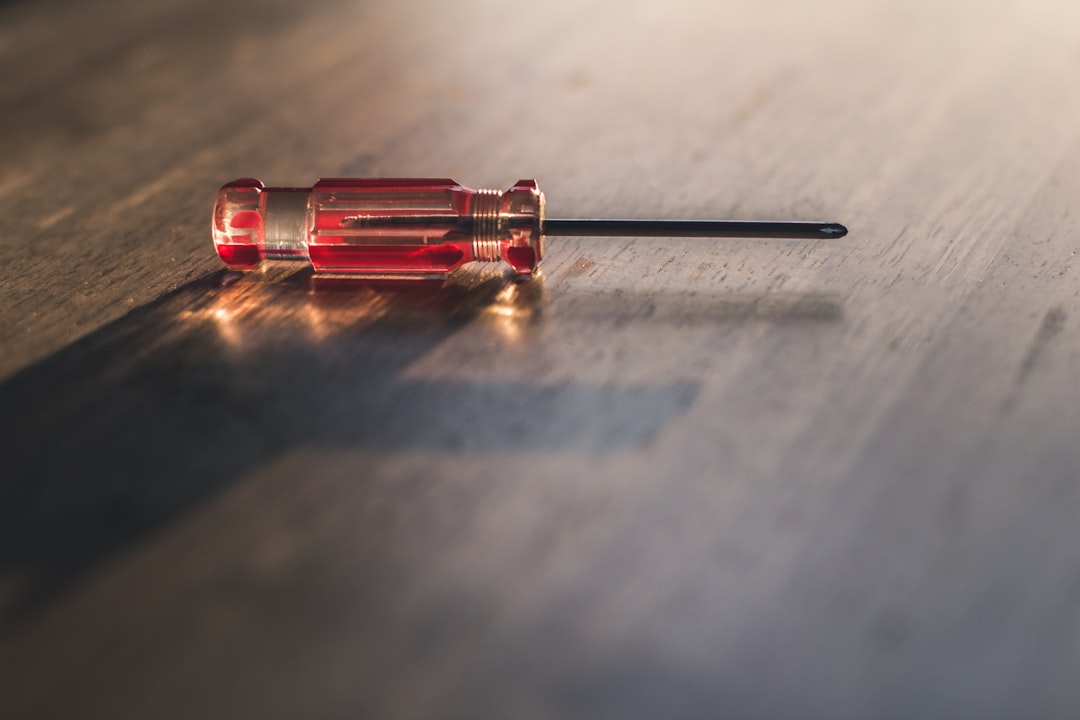
Let me say this right off the bat: Do not cheap out on screwdrivers. This doesn’t mean you need to buy the most expensive tools out there but there’s time to buy a good brand name and this is one of those times. Don’t cheap out and the crap from the dollar store.
Jim’s Pick for a good screwdriver set.
Amazon.com: CRAFTSMAN Screwdriver Set, Assorted, 12Piece (CMHT65044) : Tools & Home Improvement
Pros: Cheap! About $25 gets you all the screwdrivers you will need for everyday tasks
Cons: The flathead might break on you, but it’s very rare.
Rating: 4.8 out of 5
Alternative:
If the Craftsman I suggested above doesn’t do it for you, then here’s my second choice.
Amazon.com: CARTMAN Magnetic Screwdriver Set with Rack, Includs Precision Screwdriver, Magnetizer Demagnetizer and Magnetic Bowl, DIY Tools for Men : Tools & Home Improvement
This screwdriver kit has a lot more in it for not much more money at about 30 bucks. If you need a more advanced screwdriver set then this might be a good choice.
Shop All Screwdriver Sets on Amazon
I was not sold on this broom when we got it - not because it’s pink but because I thought the bristles were a bit stiff compared to my previous broom set.
It turns out I was wrong.
 Photo by Lucas van Oort on Unsplash
photo-1587027768084-c3a9076c0a43
Photo by Lucas van Oort on Unsplash
photo-1587027768084-c3a9076c0a43
After using this broom for a few days, you get used to it - like anything else - and for the money I paid for this broom and dustpan set, it’s fine.
Jim’s Pick for Pink Broom and Dustpan
Amazon.com: kelamayi Broom and Dustpan Set for Home, Office, Indoor&Outdoor Sweeping, Stand Up Broom and Dustpan (Pink) : Health & Household
I like this one due to the stuff brushes and the dustpan itself has some bristles that you can use to make sure all the dog hair stays in the pan and doesn’t just get moved around the bristles of the broom.
Pros: Well made and the pet hair teeth are great
Cons: the handle keeps coming unscrewed
Rating: 4.4 out of five
Alternative Option:
Amazon.com: NACENA Broom and Dustpan Set, 52-in Long Adjustable Handle Broom Dustpan Combo with Dustpan Teeth to Automatically Clean Hair Suitable for Home Kitchen Office Hall Floor(Black&Red) : Health & Household
This broom and dustpan set is cheaper by about ten bucks and looks to be pretty much the same.
Shop Brooms and Dustpans on Amazon
This really isn’t mine per se, but it’s the wife’s that’s considered in the household s I will write about it.
 Photo by Towfiqu barbhuiya on Unsplash
I hate zippered wallets, as to me they seem like another step to have to do at the counter when you need to pay so I don’t really understand the need, just like I have no reason to buy a wallet phone case as that seems like a bad idea too.
That said, here’s the wallet I would buy:
Jim’s Pick for a Women’s Zippered Wallet
Michael Kors Women’s Jet Set Double Zip Wristlet, Gold-Tone Hardware/Soft Pink: Handbags: Amazon.com
This wallet by Michael Kors looks to be a lot nicer than the weirdly-named off brand wallets you can buy and it seems to hold all things you would need such as a phone and cards and ID so I don’t know what else you would need from a small wallet for women.
Pros: Excellent quality and well worth the price
Cons: The phone slot could be a bit too tight for larger phones
Rating: 4.7 out of 5
Alternative Choice
Amazon.com: Travelambo Womens Wallet Tassel Bifold Ladies Clutch Wristlet Wrist strap Long Purse (Access Green Blooming) : Clothing, Shoes & Jewelry
Despite the weird name, the Travelambo Women’s wallet is a fraction of the price and is a good choice for those budget minded.
Shop All Women’s Wallets on Amazon
Related Posts:
Men’s Wallet
We have a lot of pens here in the house but if I had to replace them all it might be this one that gets the nod:
 Photo by Kelly Sikkema on Unsplash
Amazon.com : Paper Mate Write Bros Ballpoint Stick Pen, Black Ink with Black Barrel, 1mm Medium Point - 8 Pack (2140570) : Office Products
These little pens are not a piece of crap like a lot of other pens you can buy. Sure, they are not the cheapest pen you can buy in 2025 but they’re close and if my daughter would stay out of our junk drawer we might even have one when I went looking for a pen.
Pros: A writing experience comparable to pricier options
Cons: Easy to lose the cap. Pen is not a clicky pen
Rating: 4.6 out of 5
Another Alternative:
Amazon.com: BIC Round Stic Xtra Life Ballpoint Pen, Ultra Long Lasting and Consistent Ink Flow, 60-Count in Black Ink : Everything Else
These are the cheap blue ball point pens we know and love so if you don’t need fancy feeling pen and just want a pen that works then these might be the choice for you.
Shop Ballpoint Pens on Amazon
She sighed.
 Photo by PAN XIAOZHEN on Unsplash
She wished she could afford a house cleaner, but like everything in 2025 everything got so expensive. “It’s the economy”, the excuses said but it was something else
Amazon.com: Bissell Power Fresh Steam Mop with Natural Sanitization, Floor Steamer, Tile Cleaner, and Hard Wood Floor Cleaner with Flip-Down Easy Scrubber, 1940A : Everything Else
Her bad decisions. She didn’t go to college when all her friends did. She bought a car and got a good factory job. “Not everyone needs to go to college”, she told herself.
And for a while, she was right. She had the house and the fancy truck and all the trappings of the upper middle class. Her boots - her boots even screamed “I’ve made it”
Then the layoff notices came. Restructuring, they said.
The truck went first. She missed it, but it was a toy and there were other options including public transit. “It’s not that bad”, she lied to herself.
Amazon.com - Dupray Neat Steam Cleaner with 40-Piece Accessory Kit, Powerful, chemical-free cleaning for floors, cars, tiles, grout, and more. *Kills 99.9% of Bacteria & Viruses
Her friends were still there - the college-going friends. The ones that had “careers” and not just well paying jobs. But they didn’t have what she had - determination.
She sold some belongings on eBay and Craigslist and scraped up enough to buy a mop and broom and other cleaning supplies. For the first few jobs, this will have to do - and they did. She cleaned well and she cleaned fast and those 2 traits got her more and more referrals until one day she realized she didn’t want the house cleaner as she was the cleaner and she was fine with that.
The economy may still be bad, but she was doing great.
Shop Floor Steam Cleaners on Amazon
The child is getting a bit old for this, but it still gets played with from time to time and maybe, just maybe, it might be a little bit educational. I think there’s a few games she can play and she knows how to prank her Dad and set an alarm for the middle of the night and then stuff the watch under her bed.
 Photo by Álvaro Bernal on Unsplash
Maybe I should make this disappear for this reason alone.
Jim’s Pick for Paw Patrol Kids Watches
Amazon.com: VTech PAW Patrol Learning Pup Watch, Skye : Toys & Games
Pros: Cute for teaching time to toddlers
Cons: Strap Quality could be better
Rating: 4.6 out of 5 stars
Also Consider:
Amazon.com: Phyulls Smart Watch for Kids with 39 Games Alarm Clock, Touchscreen, Calendaring Camera Music Player Time Display Video & Audio Recording, Toys for 3-12 Years Old Boys : Electronics
This watch seems to be geared towards the older kids so it might be a better choice if yours is past toddler age which is the market for the Paw Patrol watch
Shop Kid’s Watches on Amazon
Where we live, winter boots are necessity regardless of age. Well, unless you’re a teen and then you just wear your Nike’s year round.
 Photo by Helay Hassas on Unsplash
We’ve tried to use some Ugg Boots for the child because they are cute, but nobody really cares what a six-year-old years so this year we cheaped out and got the boots that she picked out.
Jim’s Pick for Kid’s Winter Boots
Amazon.com | Lands’ End Waterproof Kids Snow Boots - Insulated Warm Fleece Lined Winter Boots for Toddlers, Girls & Boys - Cotton Candy Pink, 10 Toddler | Boots
These ended up being a pretty good buy at about $40 on sale and we like them.
Pros: Well made, comfortable and easy to put on and off. Waterproof helps too.
Cons: There’s a chance of premature wear but kids wear through stuff at such a rate it’s not like these will be family heirlooms.
Rating: 4/3 out of Five Stars.
Buy Now
There’s probably better boots but these are name brand winter boots for kids that are easy to get into and out of, are waterproof and priced usually about $40.00 on sale.
Shop Girls Winter Boots on Amazon
I really don’t know why one would need a handkerchief unless it was to tuck in a breast pocket on a men’s suit.
 Photo by 3d illustrations on Unsplash
Jim’s Pick for Handkerchiefs:
Scotamalone Men’s Handkerchiefs 100% Soft Cotton White Hankie Hankerchieves
Pros: Soft, good quality and washability
Cons: They wrinkle easily and could be considered too thin.
Rating: 4.6 stars
Buy Now on Amazon
It seems pretty gross to me to have to use a handkerchief in 2025 when you have a more palatable option of facial tissues because somehow the idea of walking around with a pocket full of boogers isn’t my idea of a good time.
I wonder if there’s a handkerchief reddit group - I’m not going to look - where you can discuss the pros and cons of booger retrieval with handkerchief vs tissues
I would guess there would be.
Shop Men’s Hankies on Amazon
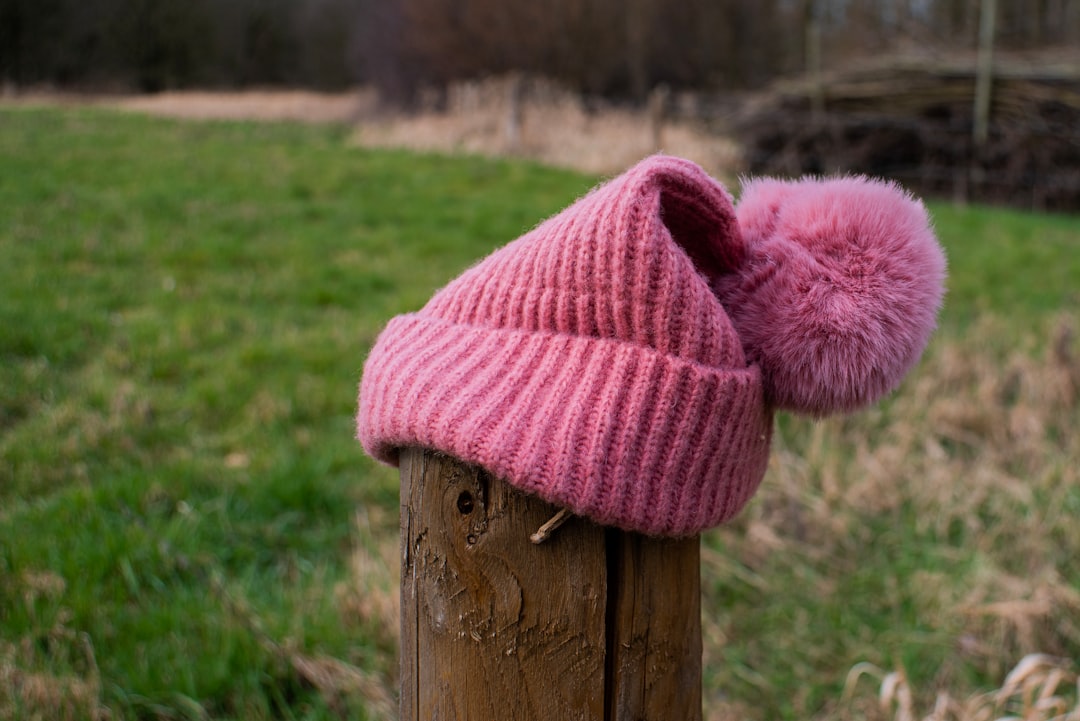 *Photo by [Lucas van Oort](https://unsplash.com/@switch_dtp_fotografie?utm_source=Obsidian%20Image%20Inserter%20Plugin&utm_medium=referral) on [Unsplash](https://unsplash.com/?utm_source=Obsidian%20Image%20Inserter%20Plugin&utm_medium=referral)*
This photo pretty much sums up the status of winter hats in our house: lost
That’s why we don’t spend a lot of money on winter hats for the kiddo because what’s the point? I usually just grab the cheapest winter hat I can find and call it a day.
Jim’s Pick for Winter Hats
Here’s a four pack of winter hats for about twelve bucks that would do the trick:
DEBAIY 3Pack Beanies Hats Knitted Caps for Men & Women & Teen (Coffee Brown/Cream White/Beige) at Amazon Men’s Clothing store
Pros: Warm in cold weather, comfortable and soft
Cons: Could be thicker in weight
Rating 4.5 stars
Buy Now on Amazon
There is absolutely no sense in buying anything greater unless the conditions are really cold and you then you should just keep the kiddos inside anyway and have them watch movies on their tablet
Shop Kids Winter Hats on Amazon
 Photo by Eli Pluma on Unsplash
I would be rich if I didn’t have to buy mittens for the child. This, and winter hats disappear at an alarming rate.
With this knowledge I suggest that you buy the cheapest winter mittens or gloves you can find.
Jim’s Pick
Amazon.com: 3 Pairs Kids Thicken Snow Mitten Winter Gloves Waterproof Warm Ski Mitten Toddler Boys Girls (Fluorescent Green, Pink, Purple,5-10 Years): Clothing, Shoes & Jewelry
I like these because they’re cheap enough and you get 3 pairs for about 5 bucks which isn’t bad at all for kids mittens. You could buy more expensive mittens but why would you when they either get lost or eaten by the Dog?
You could go the route of clips or strings to keep the mittens somehow attatched to the child, but I found they didn’t really work that well and they still got lost.
Amazon.com : kids mittens string